
Let's say you wanted to further restrict the employee center role to ONLY allow the user to view paycheck history and the W-4 form. Out of the box, the employee center role allows for this, as well as viewing purchase orders and expense reports that the user owns. There are some other minor views or records the user can see.
To accomplish this, you will first need to create a custom employee center role that limits the user’s ability to do or see anything beyond the paycheck history and W-4 as much as possible. In a case like this, the biggest concern is likely to be the Quick Search portlet. Through this, users can look up contact information that some companies may find concerning.
The solution outlined here will lock down the NetSuite dashboard so that a user with the custom role can NOT use the Quick Search portlet.

Native NetSuite allows for publishing dashboards to users within a specific role. For example, someone in the Classic Center who has permission to publish dashboards can publish a dashboard for any role in the Classic Center. However, if you are in the Employee Center role, you do not have permission to publish a dashboard, and you cannot edit the Employee Center role to allow for this. Even a custom role based on the Employee Center cannot do this.
Note: For the below solution to be possible in your account, it is necessary that you have the add-on module called SuitePeople HR. This module provides a global permission that specifically allows a user in the employee center role (or custom role based on employee center) to publish a dashboard for that role.
How to Create a Custom Employee Center Role
Navigate to Setup > Users/Roles > Manage Roles.
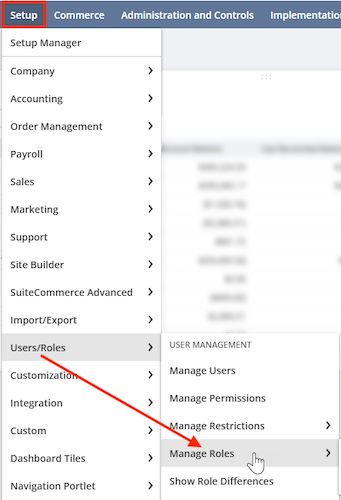
From there, find the Employee Center Role and click Customize.

Permissions and Restrictions
Under Transactions, set the following to View:
- Amend W-4
- Find Transaction (needed to view paycheck history)
- Individual Paycheck
- Personal Banking Information
If it is not already set to none, set Vendor Prepayment Approval to none.
Underneath Reports, set all listed to none.
Under Lists:
- Set Perform Search to View (if not set already).
- Set Employee Record to Edit (if not set already).
- Set everything else to none.
Steps to Publish a Dashboard
First, confirm that your environment has the SuitePeople HR module.
Under Setup > Company > Enable Features > Employees, you should see a section called HR Information System
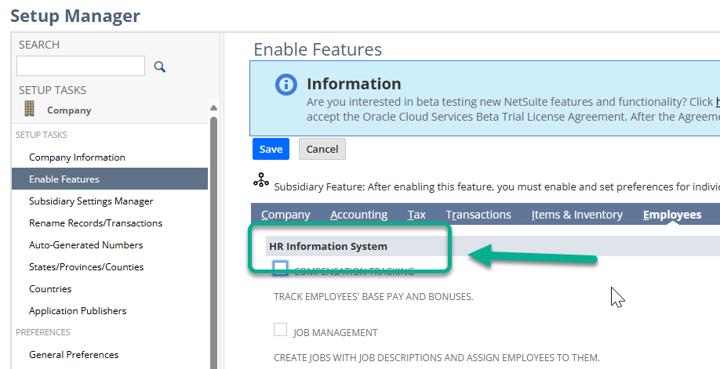
Under the HR Information System, check the box for Employee Center Dashboard Publishing.
Note: If it is not already enabled, you will be prompted to enable the Global Permissions feature, which can be found under Setup > Company > Enable Features > Employees > Permissions.

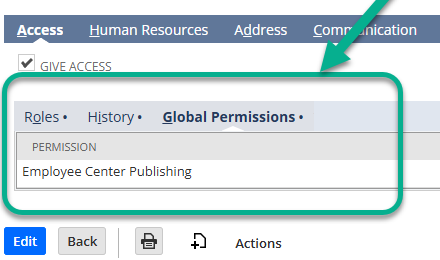
Once enabled, you can add this global permission to your user record.
Note: You will also need to have the custom role assigned to your user as well. For a refresher on assigning user roles, check out this article on NetSuite User Roles & Permissions.
Navigate to the home page and swap to the custom employee center role.
In the upper corner, you will see a button called Edit Dashboard.

Once you are in edit mode, you can add or remove portlets as with any other dashboard personalization and publishing. In this case, open the menu on the Quick Search portlet and click Remove.
Once you are done, you click Publish, and the custom employee center role now has a locked-down dashboard that the users cannot change themselves.
Author: Jordan Spinharney
Got stuck on a step in this article?
We like to update our blogs and articles to make sure they help resolve any troubleshooting difficulties you are having. Sometimes, there is a related feature to enable or a field to fill out that we miss during the instructions. If this article didn't resolve the issue, please use the chat and let us know so that we can update this article!