Setting up a subdomain for a BigCommerce site (that is not purchased through the platform) is not a well-documented process. Follow these steps to make it easier.
Step-by-step Solution
The owner of the top-level domain should log in to their Registrar/DNS host and create a CNAME record for a subdomain (ex: subdomain.topleveldomain.com). This record will ‘point to’ the Permanent Address of the BigCommerce store (this is auto-generated upon store creation and has the format of https://store-store_hash-channel_id.mybigcommerce.com.)
Step 1: Use the following settings for this step:
- Type — CNAME
- Label/Host — the domain or subdomain you want your store to be on (like shop or store)
- Destination/Target — your BigCommerce storefront’s Permanent Address (like store-xyz123.mybigcommerce.com)
- TTL — how long the server should cache the information, measured in seconds (like 3600)
Step 2: The BigCommerce Store Owner should log in to the backend and follow these steps:
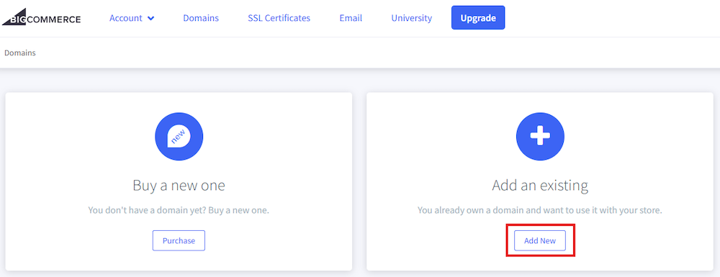
- Navigate to Settings > Domain Name (this will redirect you to the Account Dashboard) > Domains

- Click ‘Add New’ within the ‘Add an existing’ tile to start the process of adding your subdomain
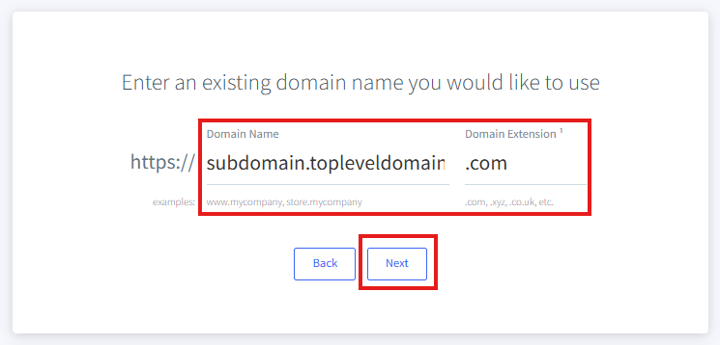
- Add your subdomain and click ‘Next’
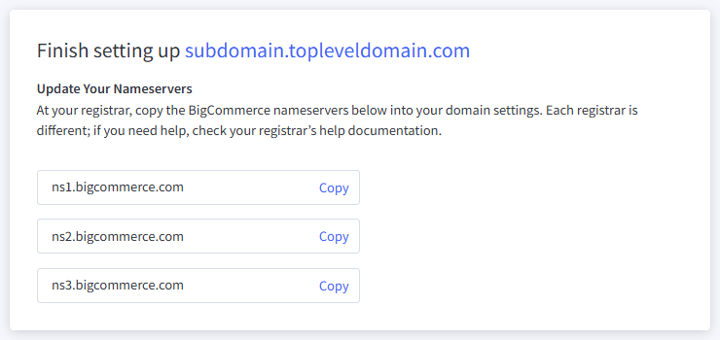
- You will then see a confirmation page directing you back to your Registrar to add the BigCommerce nameservers to your domain settings

Step 3: The owner of the top-level domain should log back into their Registrar/DNS host and add the following Nameservers to the subdomain settings:
NOTE: This process will vary from Registrar to Registrar, but here is an example of the steps on GoDaddy: How to add your Go Daddy Domain to your BigCommerce Website
Step 4: According to BigCommerce documentation, when the nameservers are changed for a domain, it can take anywhere from 24-72 hours before the domain is “fully propagated”, meaning internet infrastructure around the world has been updated with the new data.
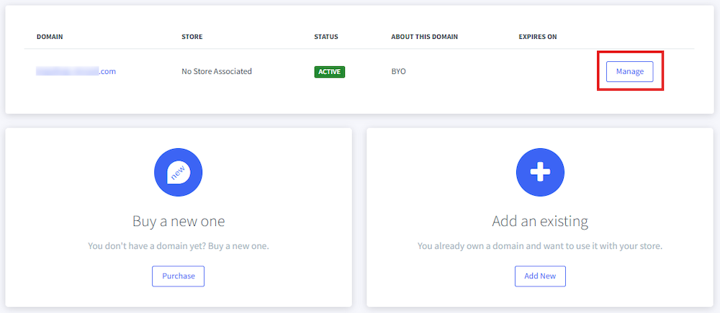
Step 5: After the domain is fully propagated, the Store Owner should log back into the backend and navigate to Settings > Domain Name (this will redirect you to the Account Dashboard) > Domains and click ‘Manage’ next to the previously-added Domain
Step 6: Select the storefront you want to assign the domain to in the Apply tile and click ‘Apply Domain.’
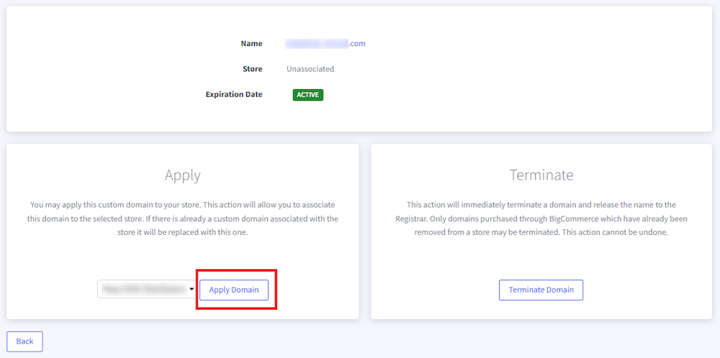
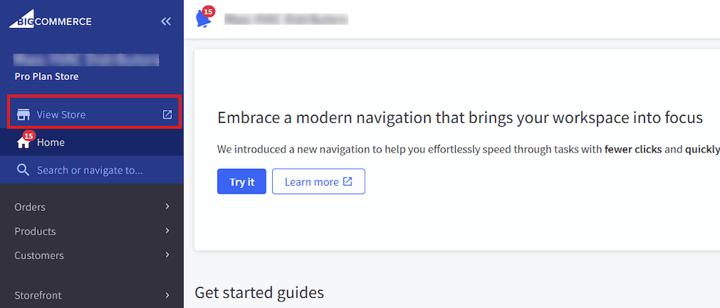
Step 7: After this action, the Domain will immediately be assigned to the storefront. If the store is still in Preview mode, clicking ‘View Store’ in the BigCommerce backend will open the store at the newly-applied Domain instead of the Permanent Domain.
Got stuck on a step in this article?
We like to update our blogs and articles to make sure they help resolve any troubleshooting difficulties you are having. Sometimes, there is a related feature to enable or a field to fill out that we miss during the instructions. If this article didn't resolve the issue, please use the chat and let us know so that we can update this article!
BigCommerce Certified Partner, Oracle NetSuite Alliance Partner
As both a BigCommerce Certified Partner and an Oracle NetSuite Alliance Partner, Anchor Group is ready to handle BigCommerce and NetSuite projects alike! Whether you already have one platform and are looking to integrate the other, are considering a full-scale implementation of both platforms or simply need support with ongoing customizations, our team is ready to help answer any questions you might have! Get in touch!

