Do you want to add a new shipping method to your NetSuite environment? Between different carriers, free shipping on orders versus items, and more, there are a lot of edge cases that you might want. This article will cover the basics of Setting Up Shipping and Creating Shipping Items.
Setting Up Shipping
Shipping preferences need to be defined in Setup > Accounting > Shipping.
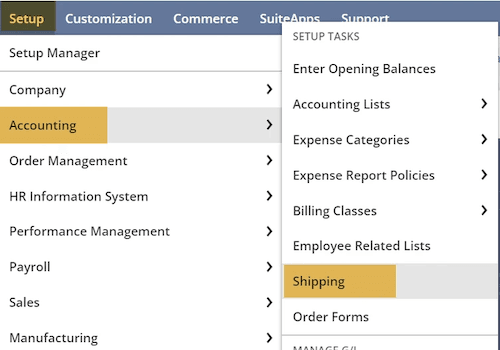
To charge shipping on ALL items, check the checkbox “Charge for Shipping.” If you do not want to charge shipping for all items, you would need to charge a separate line item. This is where Creating Shipping Items comes in handy—please see the Shipping Items section above for more information.
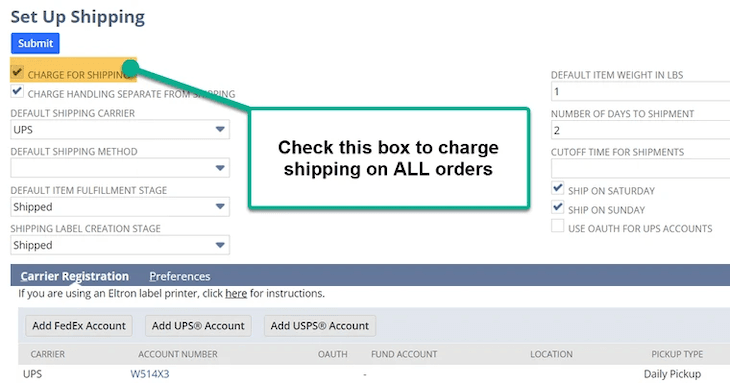
In the Carrier Registration subtab, you can also configure the settings for charging an additional handling fee, decide upon the default shipping method, and integrate your shipping accounts (FedEx / UPS / USPS Accounts).
NOTE: Integrating your Shipping Accounts in this section will be most helpful because you can take advantage of real-time shipping rates and use the NetSuite Shipping Label Integration feature.
In the Preferences Subtab, you can decide which type of rates to use for each specified carrier based on your contract with the Shipper. You can also indicate which dates you want to omit shipping.
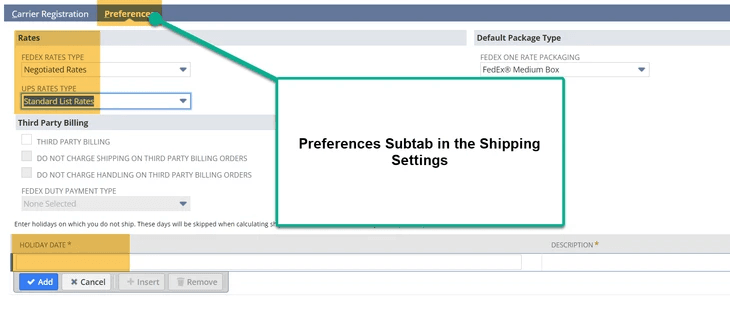
The field help is useful for distinguishing the configuration of the shipping settings.
About Shipping Items
A Shipping Item outlines how an item is shipping. Shipping Items allow you to:
- Enter a handling charge
- Set the charge item per item (by weight or flat rate)
- Define the country to which the item can be shipped
- Set the Conditions for offering free shipping
To automatically charge for shipping, utilize the process above to check the “Charge for Shipping” in the Shipping Accounting Settings.
If you do not automatically charge for shipping, you can include shipping items by creating a shipping item record. This allows you to charge shipping on individual orders and invoices.
More information about shipping items can be found in this NetSuite article.
Creating Shipping Items
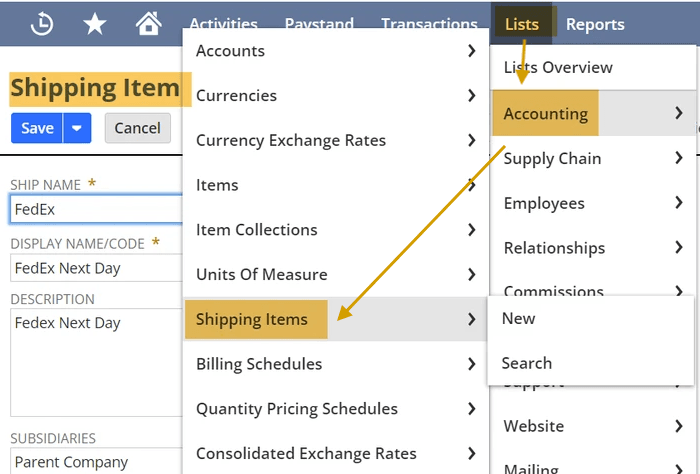
Navigate to Lists > Accounting > Shipping Items > New and enter a unique Ship Name and Display Name/Code.
- The Display Name/Code surfaces on your printed forms, webstore, and customer center.
Add the Description, Subsidiary, and check the “Display in Web Site” checkbox.
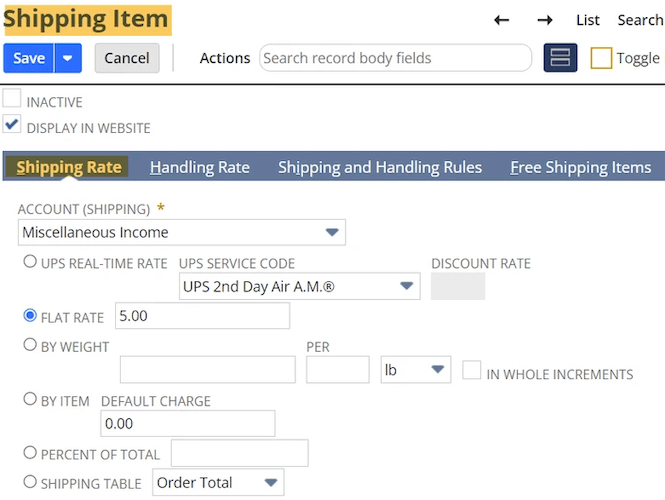
Shipping Rate Subtab
In the Shipping Rate subtab, you can:
- Select which Account should be credited to for the shipping fees.
- Determine how your shipping item will be charged (flat rate, by weight, by item total, or the percentage of the total).
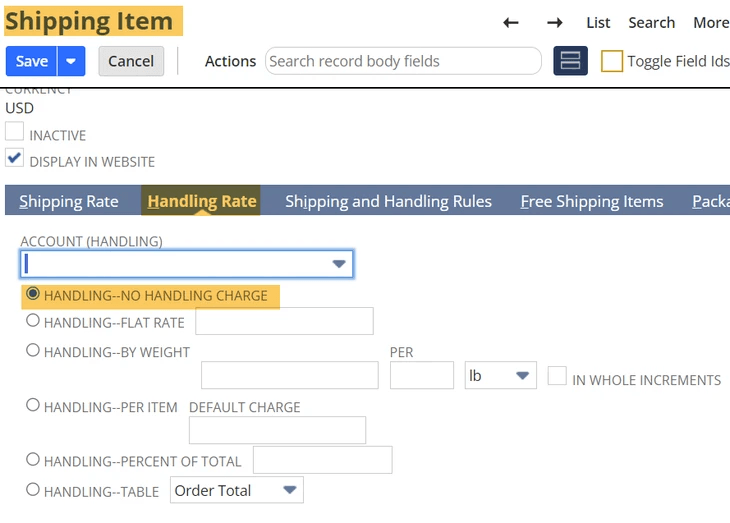
Handling Tab
In the Handling Tab, you can configure the rates for how you desire to charge Handling Fees. I would recommend utilizing the field help for more information.
- This tab has many of the same selections as the Shipping Tab, yet it is added in case you want to utilize a Handling Fee.
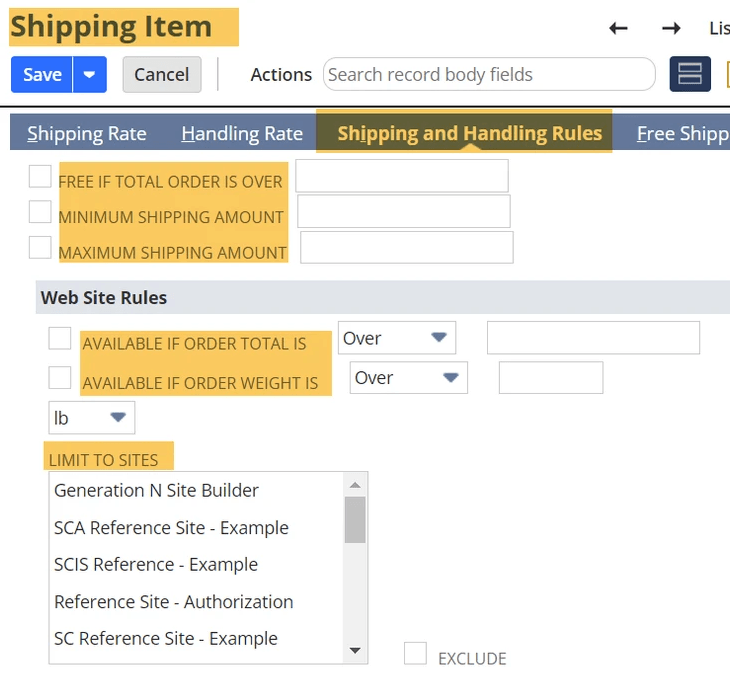
Shipping and Handling Rules
The Shipping and Handling Rules tab is where you can configure settings for specific rules based on cart cost, such as if the weight is over or under a certain limit and restricting shipping items to a specific site.
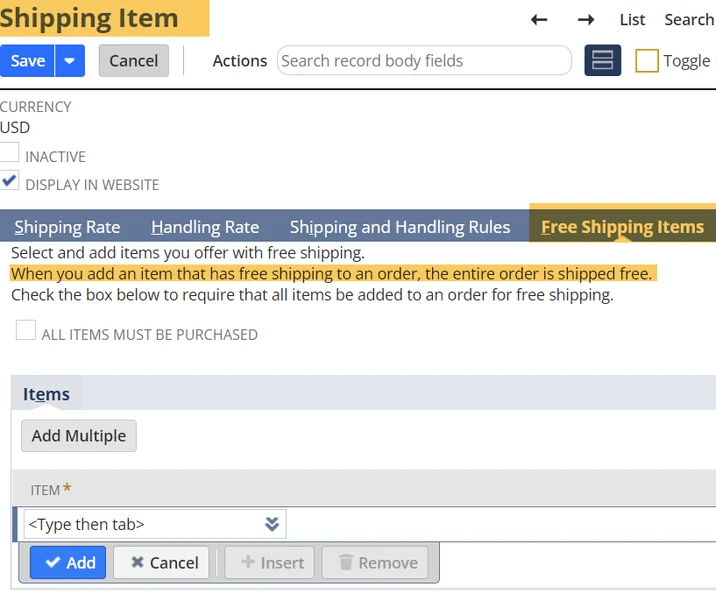
Free Shipping Items Tab
Here, you can choose items that will cause the whole order to ship for free.
Important! Inadvertently adding these items could lead to many items shipping for free. It could be a good idea to double-check with key decision makers at your company before adding an item to this list.
Packaging Tab
Here you can configure if you want to Omit the native Packaging Logic.
- NetSuite natively limits 50 packages per order – if you exceed this amount, the order will not save, and the system will display an error.
- Checking this checkbox ensures that the order will send only one package for the order.
Related Articles
- SuiteCommerce Default Shipping and Pre-Selected Shipping Methods
- Survive Tariffs with Strategic Shipping Automation
Get stuck in a step during this article?
We like to update our blogs and articles to make sure they help resolve any troubleshooting difficulties you are having. Sometimes, there is a related feature to enable or a field to fill out that we miss during the instructions. If this article didn't resolve the issue, please use the chat and let us know so that we can update it!
Tagged with Training
