Manually Rebuilding the Navigation Bar in SuiteCommerce
If you ever need to re-build the SuiteCommerce navigation bar from the Configuration Record without using the ‘Categories Placeholder', this is your guide!
- Date
- December 16, 2025
- Read
- 6 min

Manually Rebuild the Commerce Category Navigation Bar #SuiteCommerce #navigationmenu
If you ever need to re-build the SuiteCommerce navigation bar from the Configuration Record without using the ‘Categories Placeholder', this is your guide!

Navigation Bar on the SC site – often the Commerce Categories
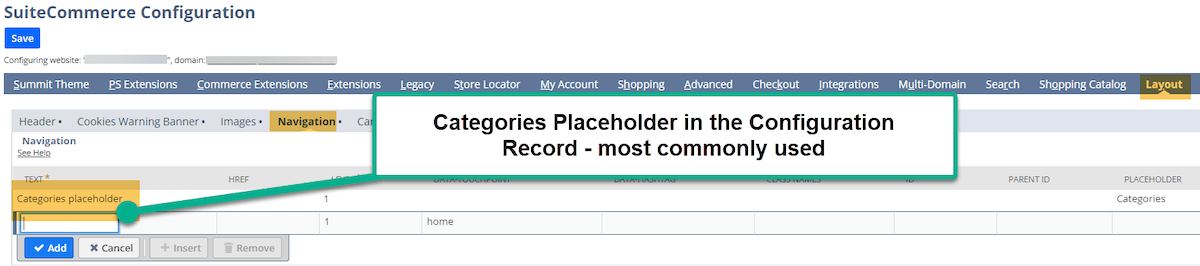
SuiteCommerce Navigation Bar Categories Placeholder
The navigation bar on the SuiteCommerce website helps the user click on different sections or commerce categories on the website. The most commonly used method to complete this task is to utilize the Categories Placeholder.
When to Rebuild the Commerce Category Navigation Bar?
The other way to manually build the commerce bar can be completed in the configuration record, and this process will be outlined below. Two reasons a company might choose to rebuild its navigation bar manually are:
1. The company desires to create specific landing pages for their Commerce Category pages instead of using the native Commerce Categories to host many products.
2. The company has multiple domains on the single website setup record (B2B and B2C), and it needs to order its commerce categories for one of the sites manually.
For more information, I highly recommend this article which covers how to manage this case for two domains on a single website setup record: B2B and B2C Domains on One SuiteCommerce Website Setup Record.
NOTE: An Admin or Store Manager role is needed to access the Configuration Record and to complete the below steps.
Step 1: Open the Navigation Tab
NOTE: An Admin or Store Manager role is needed to access the Configuration Record and to complete the below steps.
Go to the Navigation Subtab in the Configuration Record.
- Click Commerce > Websites > Configuration.
- Select the Site and Domain and select the ‘Configure’ button.
- Click the Layout tab and Navigation Subtab.
Step 2: Set the Text Field
This field is the text that surfaces in the store.

Step 3: Set the HREF Field
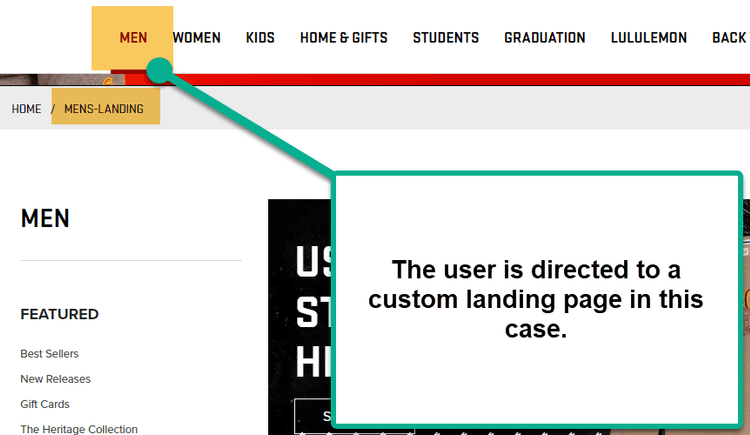
This is the relative URL of the page that you want the user to click on. This can be the native commerce category page, or it could be a custom landing page. For example, the first option below on the left directs to a landing page pictured on the right.
If you do not want the user to be directed to any page, use the “#” symbol, as seen in the blue box on the left.

Configuration Record View
Webstore View
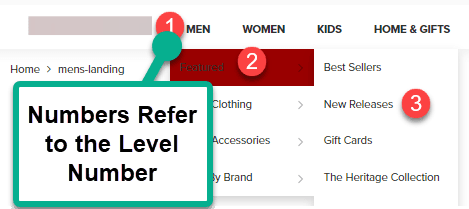
Step 4: Set the Level Field
This field dictates the hierarchical level for this navigational link.
To surface a link on the webstore first, make the link a level 1.
Level 2 links live under Level 1 links with the same ID/parent ID, which we will cover in steps 8 and 9.
The maximum amount of navigation link levels is 3.
Step 5: Set the Data Touchpoint
This is touchpoint of the navigational link. This relates to the website set up record touchpoints, and most commonly will be “Home”.
If you are using other touchpoints like “Cart” and the URL is outside that SSP touchpoint (like the “checkout,” for example), the page will not properly load.
Adding this screenshot again for ease of use for the reader. You're halfway there!
Step 6: Set the Data-Hashtag
This field specifies and adds another link that helps the browser traverse the page more efficiently. Though this is best practice to add, at the time of writing this article, it is not a required field for entry.
Most commonly, the data-hashtag mirrors the HREF, only with a hashtag ( # ) preceding the slash ( / ).
Step 7: Set the Class Names
This field allows the user to configure the HTML class names that will be added to this link. At the time of writing, it is not a required field.
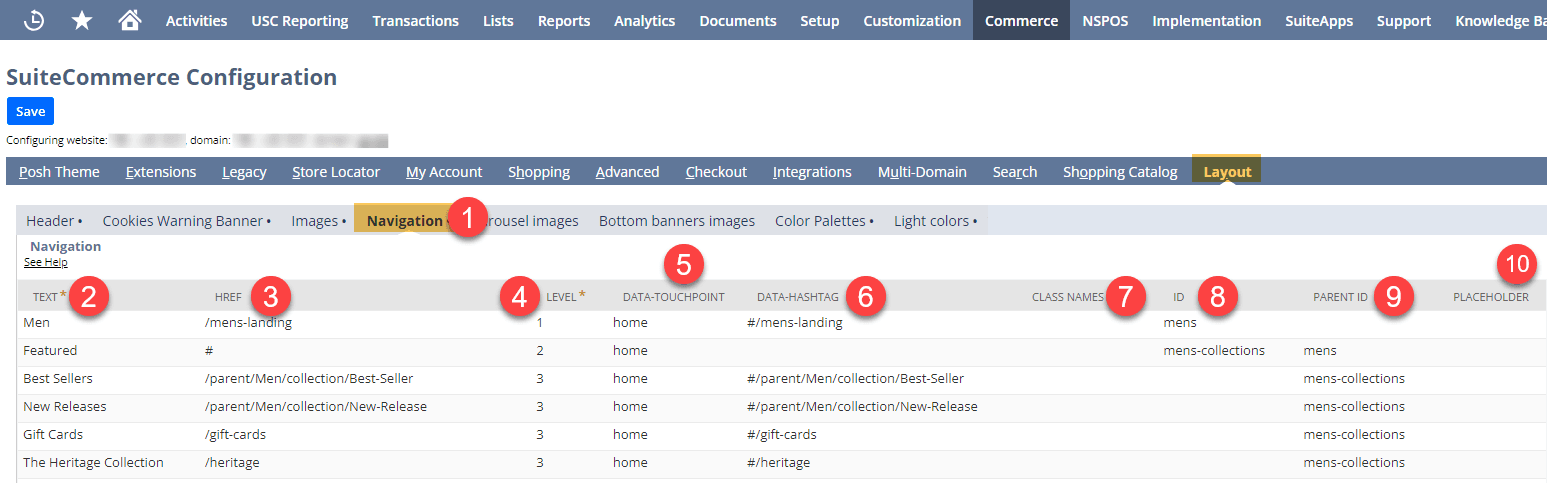
Step 8: Set the ID
This specifies the internal identifier of the navigation link. If this link is a parent (level 1) link, it must have an ID for the child (level 2) link to reference.
In the above screenshot, the ID for the “Men” link is “Mens.”
Notice that the Parent ID for “Featured” matches the ID for “Men.”
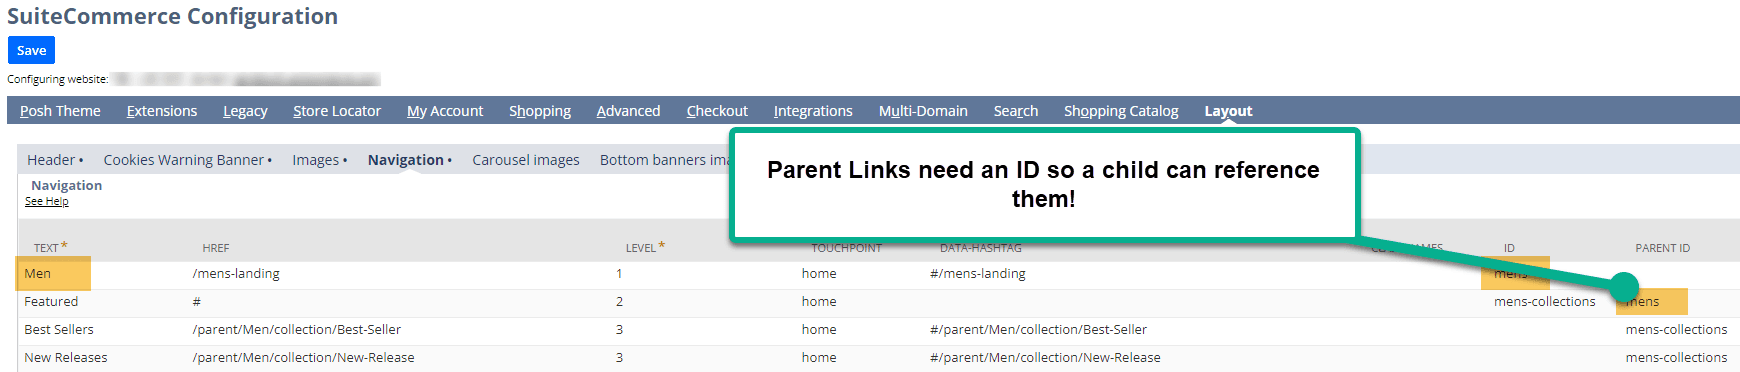
Linking IDs and Parent IDs
Step 9: Set the Parent ID
This is the indicator for the parent ID if this is a child navigation link. All Navigation Links are ordered by Parent IDs and IDs and organized by Level.
Step 10: "Categories" Value
This adds the Category Tree to the website's navigation menu. Enter the value “Categories” to add categories to the menu. This is not a mandatory field, and the site can operate with it blank.
Step 11: Check the Navigation Functionality on the Website
After these fields are properly configured, hit Save on the Configuration Record. Next, perform a Cache Invalidation Request and hard refresh (Ctrl + shift +R) on your site to see your changes.
Got stuck on a step in this article?
We like to update our blogs and articles to make sure they help resolve any troubleshooting difficulties you are having. Sometimes, there is a related feature to enable or a field to fill out that we miss during the instructions. If this article didn't resolve the issue, please use the chat and let us know so that we can update this article!
FREE SuiteCommerce Book
If you liked this article, you'll LOVE our book on SuiteCommerce! Order the free SuiteCommerce book today, and we'll even pay for shipping!
Oracle NetSuite Alliance Partner & Commerce Partner
If you have general questions about SuiteCommerce or more specific questions about how our team can support your business as you implement NetSuite or SuiteCommerce, feel free to contact us anytime. Anchor Group is a certified Oracle NetSuite Alliance Partner and Commerce Partner equipped to handle all kinds of NetSuite and SuiteCommerce projects, large or small!
We are a premium SuiteCommerce agency that creates powerful customer portals. Unlike our competitors, we have already solved your problems.
Tagged with Training